I am Sew in Love with Bullet Journaling: How to Sew Bullet Journal Inserts
When I am not writing letters or crafting envelopes I do freehand embroidery work. Embroidery was one of my first creative passions. I learned to sew when I was three and haven't stopped since. Recently I have begun sewing inserts into my bullet journal and have received many questions on various forms of social media on how I created this type of spread. Armed with a needle and thread I decided it was time I created a blog post about this fun insert!
Materials:


Materials:
- A notebook
- Paper
- A glue stick (I recommend using a craft bond gluestick or an extra-strength glue stick)
- Scissors
- A needle
- Thread
- Embellishments
- A folder
Step 1: Cut paper to the size of the Bullet Journal and select paper that will be used as the additional insert

I highly recommend using cardstock paper, it is less likely to rip in the sewing process and will create a more enjoyable writing experience. I have created multiple page inserts out of vellum paper but they ended up tearing very easily. You will need to select one piece of paper that will be glued onto the bullet journal pages and one piece (or a couple of pieces) of paper that will be used as the insert. Make sure that the paper will fit inside the bullet journal so it won't get caught torn on the outside edges! You will next want to crease the paper that you will be using for the spread. Make sure to get a sharp edge so it will fit better into your bullet journal.
Step 2: Prepare Needle and Thread and Start to Sew
For this project, I used a thin 4 cord cotton. I can always find this type of thread at vintage stores and really love to sew with it. Make sure you choose a durable thread as you don't want it to break while you are sewing. I used a wider headed needle due to the nature of my thicker cotton thread. I dedicate a couple of needles to paper crafting as it does dull the tip of the needle. I find a lot of my needles at estate sales and garage sales!

You will want to tie a nice big not on the back of the paper. Make sure to knot your thread on the piece of paper that will be glued down. Line up the pieces of paper and begin to sew.

I find it easier to use large stitches while you are sewing as the paper is less likely to be torn. When you are finished sewing the vertical length of the paper tie the string with a large knot. For this project, I created an extra loop so I could attach a tassel and a bow to the base of my bullet journal. What can I say...I love to embellish!
Step 3: Glue

I usually use a craft bond or extra-strength glue stick in all of my craft projects. If you are using a thinner paper I would recommend that you use a double-sided adhesive runner as the paper will buckle and not look as nice.
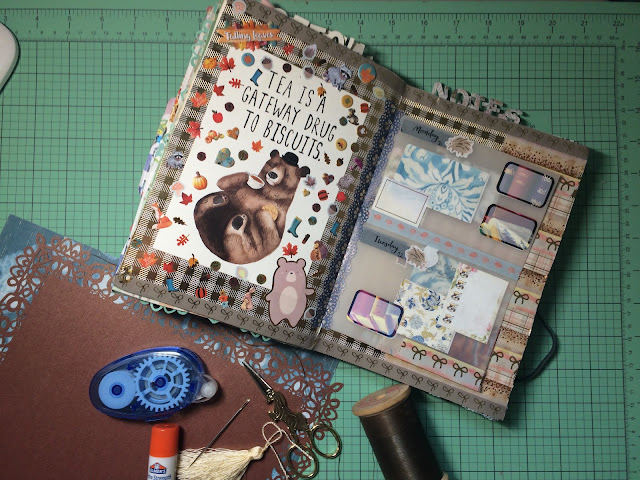
Step 4: Embellish
Once you have glued in your insert to your journal, you can start embellishing! In this particular project, I used a collection from The Planner Society's September subscription box!


Such a great idea and another way to use sewing skill. Thank you for this tutorial, Liv! (@tinkletinkletter)
ReplyDeleteThank you
DeleteThank you for the tutorial!!! ( Rumiko73 from Instagram)
ReplyDeleteLovely and inspiring things you are doing! @zokibird from Instagram
ReplyDeleteThank you!
DeleteSoo beautiful and informative, will definitely give a try (@geetika.mint from instagram )
ReplyDeleteThank you!
DeleteLooking great, gotta give that a try too (@aikunihana on Instagram)
ReplyDeleteThank you!
DeleteGoing to use all this as inspiration ! Your ideas are amazing
ReplyDeleteFrom @med_postcards