Pretty in Pages: How to Make Shaker Notebook Inserts
It's back to school season and I wanted to share a fun way to dress up a journal or notebook. This is guaranteed to make you smile every time you open your notebook. After I was flooded by questions of how I created my August Spread page in my Bullet Journal I decided to share this tutorial with you. Whether you are using your journal to take notes, doodle, plan or draw, this is the perfect project for you.


I used a clear plastic bag from a Sticker Geek Designs order that I had recently purchased. This is a great way to reuse, reduce and recycle while also saving money.
Step 4: Embellish
There are so many different ways that you can decorate these pages. I used glitter edgers from The Planner Society, which were a great way to add some extra bling to this project. I used a mix of sequins from Doodle Bug and Craft Consortium.
I can't wait to see what you create!


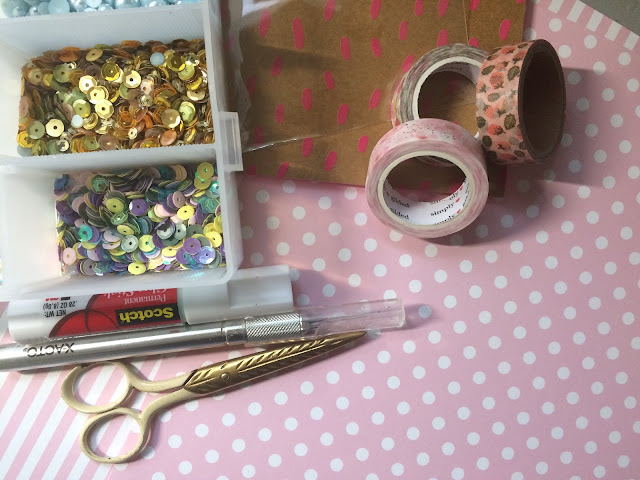
The Materials:
- A notebook
- A clear Plastic Envelope
- An Exacto knife
- Scissors
- Sequins or Glitter
- An Adhesive Roller
- Gluestick
- Embellishments
- A Ruler

Step 1: Trace Border for Bejeweled Insert
Armed with my grandmother's ruler and a pencil I measured out an inch border from the edges of the notebook. I made sure that this would be large enough to show the most amount of sequined glittery goodness but also made sure that my clear plastic envelope would fit in a cutout that I had made.

Step 2: Cut Paper to make Window
I don't have a traditional cutting mat so I repurposed a bubble mailer from my recent Sticker Geek Designs order. Make sure you put some sort of back between the paper and the rest of the pages so you don't get stuck with a bunch of cut pages. It is important to remember that you will be cutting two pages out for this Shaker Notebook Insert.

I used a ruler to make sure that I kept my line straight. Please be careful as you cut, I don't want any hurt fingers.

After I cut the pages I took the paper out and then erased any marks that were leftover from the pencil outline.
Step 3: Fill Your Plastic Envelope with goodies and then adhere Plastic Envelope to Paper
I opted to use an adhesive roller and then a glue stick to seal it all up. The glue stick did leave a bit of puckering on the paper as the pages in this journal are thin.


I opted to use an adhesive roller and then a glue stick to seal it all up. The glue stick did leave a bit of puckering on the paper as the pages in this journal are thin.


I used a clear plastic bag from a Sticker Geek Designs order that I had recently purchased. This is a great way to reuse, reduce and recycle while also saving money.
Step 4: Embellish
There are so many different ways that you can decorate these pages. I used glitter edgers from The Planner Society, which were a great way to add some extra bling to this project. I used a mix of sequins from Doodle Bug and Craft Consortium.
I can't wait to see what you create!


Comments
Post a Comment